When it comes to adding finishing touches to a tiled floor or wall, quarter round is often the go-to choice for many homeowners. This small molding piece can add a touch of elegance and sophistication to any space, while also serving as a protective barrier against wear and tear.
However, the question arises: can you glue quarter round to tile? The answer is yes, but there are certain steps that must be followed in order to ensure a secure and long-lasting bond.
Before attempting to glue quarter round to your tile surface, it is important to properly prepare the area. This includes cleaning and drying the tiles thoroughly so that they are free from any dirt or debris that could hinder adhesion. Additionally, taking precise measurements of your space will help ensure that you have enough quarter round material for the job at hand.
With these preparations in place, you can confidently move on to selecting the right adhesive and applying it in a way that ensures maximum bonding strength between your tile surface and quarter round molding.
Key Takeaways
- Proper preparation of the tile surface is crucial before gluing quarter round, including cleaning and drying.
- Choosing the right adhesive and precise measurements are important for a successful installation.
- Clamps or tape can be used to hold the quarter round in place while the adhesive dries, but caution should be taken to avoid damage.
- Filling gaps or holes with caulking is important to prevent moisture from seeping behind the quarter round.
Prepare the Surface
Before gluing quarter round to tile, it is imperative to ensure that the surface is clean and free of any debris or contaminants that can inhibit adhesion.
Surface cleaning involves removing any dirt, dust, or grime from the tile surface using a mild detergent and water solution. This will allow the adhesive to bond effectively with the surface without any hindrance. Additionally, sanding the tile surface lightly may also aid in improving adhesion by creating a roughened texture for better grip.
It is essential to remember that any bumps or unevenness on the surface must be leveled out before proceeding with gluing quarter round onto tiles. Once the surface is prepared adequately, you can move onto choosing the right adhesive for your project needs.
Choose the Right Adhesive
Selecting an appropriate adhesive is crucial when considering attaching quarter round to a tiled surface. There are different types of adhesives available in the market, and choosing the right one can ensure a strong bond that lasts for years.
Before selecting an adhesive, it’s essential to clean the surface thoroughly, removing any dirt or grime that may hinder proper bonding. The type of adhesive used will depend on the material of both the quarter round and tile. For example, some adhesives work better with wood while others are more suited for ceramic or porcelain tiles.
Additionally, it’s vital to consider the environment where the quarter round will be installed – whether it’s exposed to moisture or extreme temperatures – as some adhesives may not hold up well under certain conditions. Once you have chosen your adhesive, you can move onto applying it to your cleaned surface.
Apply the Adhesive
The proper application of adhesive is crucial for ensuring a durable bond between the quarter round and the tile.
When selecting an adhesive, it’s important to consider factors such as the type of surface being bonded, expected load-bearing capacity, and environmental conditions like temperature and moisture.
There are several types of adhesives available in the market that can be used to glue quarter round to tile, including epoxy, silicone, acrylic, and polyurethane-based options.
Once you’ve chosen the appropriate adhesive for your specific needs, applying it correctly is essential for achieving a strong bond. Applying techniques may vary depending on the type of adhesive being used; however, some general guidelines include cleaning both surfaces thoroughly with a damp cloth before applying the adhesive and allowing sufficient drying time before securing the quarter round in place.
By following these steps carefully when gluing quarter round to tile with appropriate adhesive and application techniques ensures safety and durability in your home or office space without compromising on aesthetics.
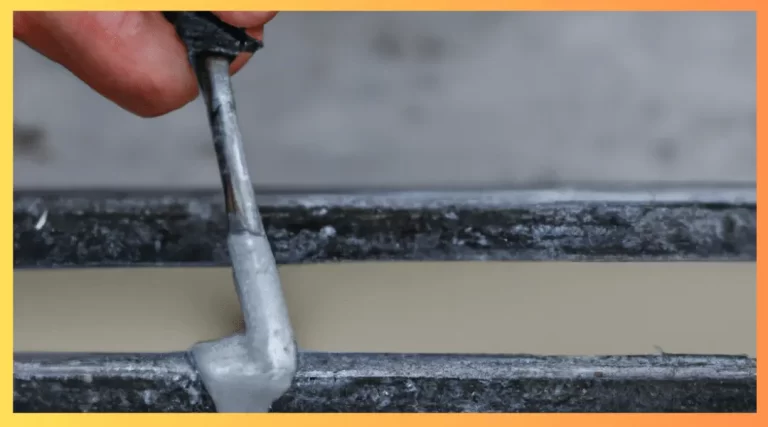
Secure the Quarter Round
To secure the quarter round in place, it is recommended to use clamps or tape until the adhesive dries.
This will ensure that the quarter round stays securely attached to the tile without shifting during the drying process.
It is crucial to allow sufficient time for the adhesive to dry completely before removing any clamps or tape, as premature removal may cause the quarter round to detach and compromise its effectiveness.
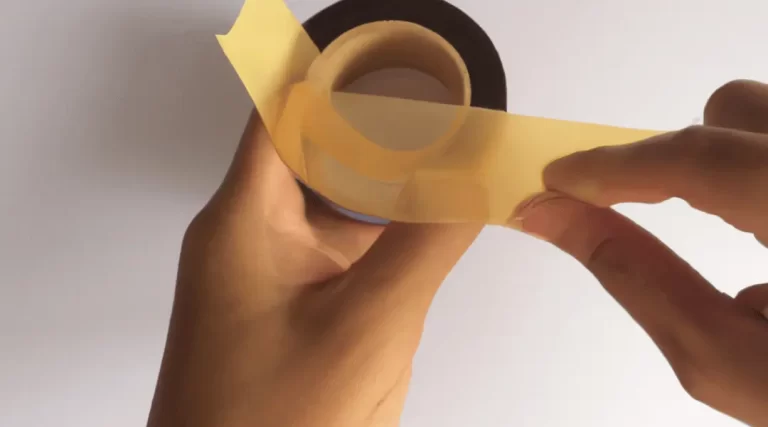
Use Clamps or Tape to Hold the Quarter Round in Place
Using clamps or tape can be an effective way to secure the quarter round in place while gluing it onto tile. When deciding between using clamps or tape, there are a few things to consider. Clamps provide a stronger and more reliable hold but may potentially damage the quarter round or tile if not used properly. Tape is less likely to cause damage but may not hold as securely as clamps. Alternatively, there are alternative adhesives that can also be used such as liquid nails or epoxy glue which provide a strong hold without the need for additional securing methods. Whichever method is chosen, it is important to ensure that the quarter round is held firmly in place while the adhesive sets and dries properly before continuing with any further installation steps.
Allow the Adhesive to Dry
After applying the adhesive, it is important to allow sufficient time for it to dry completely before proceeding with any further installation steps.
While waiting for the adhesive to dry, exercise patience and avoid rushing the process. Rushing may cause the quarter round to shift or move out of place, which can lead to a less than perfect finish.
Allowing ample drying time ensures that the quarter round adheres properly to the tile surface, creating a strong and long-lasting bond.
If you’re hesitant about using adhesive, there are alternatives such as double-sided tape or even nails. However, these methods may not provide the same level of durability as adhesive.
Ultimately, taking your time during this step will pay off in providing a secure and professional-looking finish once you proceed with completing the job of trimming your tile edges.
Finish the Job
Completing the installation of quarter round on tile requires attention to detail and precision in order to achieve a polished finished look. After allowing the adhesive to dry completely, it is important to finish the job by filling any gaps or holes with caulking. This will help prevent moisture from seeping behind the quarter round and potentially causing damage.
Additionally, there are various painting options or alternative materials that can be used to further enhance the appearance of the quarter round. However, it is important to always follow manufacturer instructions and safety guidelines when dealing with adhesives and tools.
By taking these steps, homeowners can ensure a successful installation that not only looks great but also functions properly for years to come.
Conclusion
When it comes to gluing quarter round to tile, there are a few important steps that need to be followed in order to ensure a successful and long-lasting installation.
First, the surface must be properly prepared by cleaning and drying it thoroughly.
Next, choosing the right adhesive is crucial for a secure bond between the quarter round and tile.
Once the adhesive has been selected, it should be applied carefully and evenly using a notched trowel.
The quarter round can then be pressed firmly into place, making sure that it is aligned correctly before securing it with finishing nails or clamps.
Finally, any excess glue should be wiped away and left to dry completely before painting or staining the quarter round.
Overall, gluing quarter round to tile requires attention to detail and careful execution in order to achieve a professional-looking finish.
By following these steps correctly, homeowners can enjoy an attractive and functional addition to their home décor that will stand the test of time.