Whether you’re a DIY enthusiast or a professional carpenter, reattaching veneer to different surfaces can be a challenging task. Veneer is a thin layer of wood that is applied to furniture, cabinets, and other surfaces to enhance their aesthetic appeal. Over time, a veneer can become loose or chipped, compromising the appearance and functionality of the surface. To avoid replacing the entire piece of furniture, reattaching the veneer with the right adhesive is essential. Suitable Adhesives For Reattaching Veneer To Different Surfaces
The process of reattaching veneer requires careful consideration of the type of adhesive to use, the material of the surface, and the type of veneer being used. With a range of adhesives available on the market, it can be overwhelming to choose the right one for your project.
This article aims to provide a comprehensive guide on suitable adhesives for reattaching veneer to different surfaces, outlining the factors to consider when selecting an adhesive, the preparation process, and the steps to follow when applying the adhesive. By following this guide, you can restore the beauty and functionality of your furniture and surfaces with confidence.
Understand the Different Types of Adhesives
The classification and understanding of various adhesive types is a crucial aspect in the successful restoration of surfaces with a thin layer of wood. Different adhesive properties must be considered when selecting the right adhesive for the job.
Some adhesives are better suited for porous surfaces, while others work better on non-porous surfaces. Additionally, some adhesives have a longer drying time, while others dry quickly. It is important to consider the specific needs of the project and the materials being used before selecting an adhesive.
With this in mind, it is important to consider the material of the surface when selecting an adhesive, as different materials may require different types of adhesives for optimal results.
Consider the Material of the Surface
When reattaching veneer to different surfaces, it is crucial to consider the material of the surface.
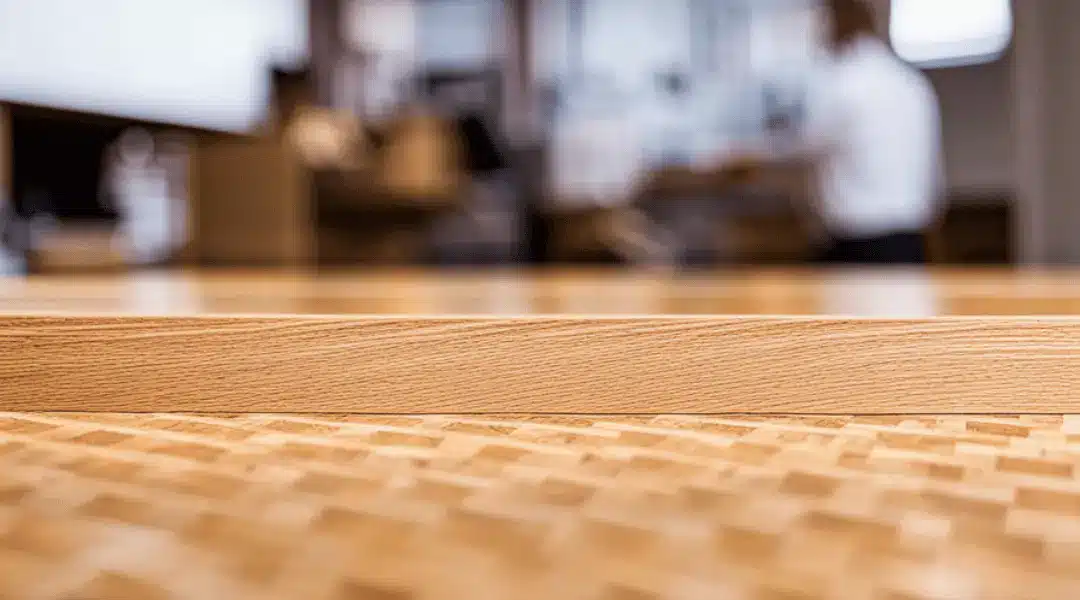
Wood surfaces require an adhesive that is strong but flexible, as wood expands and contracts with changes in temperature and humidity.
For metal surfaces, an adhesive that can withstand high temperatures and has good bonding strength is necessary.
Glass surfaces require an adhesive that is transparent and can withstand high stress.
Plastic surfaces require an adhesive that can bond well with both the plastic and the veneer, and is resistant to solvents and moisture.
Considering the material of the surface is essential in selecting the most suitable adhesive for reattaching veneer.
Wood
Wooden surfaces have a natural tendency to expand or contract with changes in temperature and humidity, which can compromise the bond strength of adhesives, leading to a failure rate of up to 40% in some cases.
When it comes to wood veneer repair, there are several techniques for veneer restoration that can help ensure a successful reattachment.
First, it is important to carefully clean the surface of the wood and remove any loose or damaged veneer.
Next, using a high-quality adhesive that is specifically designed for wood surfaces is crucial. Some suitable adhesives for wood veneer repair include PVA glue, hide glue, and epoxy.
It is important to choose an adhesive that is strong enough to hold the veneer in place, but also flexible enough to allow for slight movement in the wood.
Finally, applying pressure to the veneer while the adhesive sets is essential for a successful bond. This can be achieved by using clamps or weights to hold the veneer in place.
By following these techniques, the risk of adhesive failure can be minimized, and the veneer can be effectively reattached to the wooden surface.
Moving on to metal surfaces, there are different considerations to take into account.
Metal
Repairing metal surfaces requires special attention to the unique properties of the material, which can greatly affect the success of the adhesive bond and ultimately impact the longevity of the repair.
Metal bonding techniques include mechanical fastening, welding, and the use of adhesives.
Adhesives are often a preferred method as they can provide a more aesthetically pleasing result and can be less invasive than other methods.
However, the choice of adhesive is critical as not all adhesives are suitable for bonding metal surfaces.
Advantages of using metal adhesives include the ability to bond dissimilar metals and to distribute stress evenly across the joint.
Disadvantages include the potential for reduced strength at high temperatures and the need for proper surface preparation to ensure adequate adhesion.
When selecting an adhesive for metal veneer repair, factors such as the type of metal, the environment to which the repair will be subjected, and the desired longevity of the repair must be taken into consideration.
Moving onto glass, the unique properties of this material will require a different approach to adhesive selection and application.
Glass
The Glass bonding techniques present unique challenges due to the specific properties of the material, requiring careful consideration of adhesive selection and application. Glass veneer adhesion techniques involve the use of specialized adhesives that are designed to adhere to glass surfaces.
It is important to note that safety precautions should be taken when working with glass, as it is a fragile material that can easily break or crack. When applying veneer to a glass surface, it is important to ensure that the surface is clean and free from any dust or debris. The adhesive should be applied evenly and in a thin layer to ensure proper adhesion and prevent any air bubbles from forming.
It is also important to allow sufficient drying time before handling the glass to prevent any damage to the veneer or the glass surface. When working with glass veneer adhesion techniques, it is important to follow the manufacturer’s instructions carefully to ensure a successful outcome.
Moving onto the next subtopic, when it comes to plastic surfaces, there are specific adhesives that are designed to adhere to this material, which we will explore in the subsequent section.
Plastic
When it comes to reattaching veneer to plastic surfaces, it is essential to consider the benefits of plastic veneer as well as the common issues with plastic veneer adhesion.
A plastic veneer is a suitable option for those looking for a cost-effective and durable alternative to traditional wood veneer.
However, the adhesion of plastic veneers can often be a challenge due to the smooth and non-porous nature of the surface.
To ensure a successful adhesion, it is recommended to use an adhesive that is specifically designed for plastic surfaces.
Some benefits of plastic veneer include its ability to resist moisture, scratches, and fading.
However, common issues with plastic veneer adhesion include poor bonding due to the smooth surface of the plastic, as well as issues with the adhesive not being able to withstand the stress and strain of everyday use.
To avoid these issues, it is important to choose an adhesive that is designed for plastic surfaces and to properly prepare the surface by cleaning it thoroughly before applying the adhesive.
Considering the type of veneer being used is also important in ensuring a successful adhesion.
Consider the Type of Veneer Being Used
Understanding the type of veneer being used is a crucial factor to consider when selecting the appropriate adhesive for successful veneer repair. Different types of veneer, such as wood, stone, or ceramic, require different types of veneer adhesives to ensure proper adhesion.
Factors affecting veneer adhesion include the surface texture, porosity, and composition of the substrate, as well as environmental conditions, such as temperature and humidity. For example, a wood veneer requires a flexible adhesive that can accommodate the natural movement of the wood, while a stone veneer requires a more rigid adhesive to withstand the weight and pressure of the stone.
Therefore, it is important to carefully evaluate the type of veneer being used before selecting the appropriate adhesive for the repair. Preparation for an adhesive application involves cleaning and smoothing the surfaces to be bonded, as well as ensuring that they are free from debris or contaminants that may interfere with adhesion.
Preparation for Adhesive Application
To properly prepare a surface for adhesive application when reattaching veneer, there are three important steps to consider.
The first step is to thoroughly clean the surface to ensure that any dirt or debris is removed.
The second step is to sand the surface to create a rough surface that will allow the adhesive to grip tightly.
Finally, applying a primer will help the adhesive to bond better to the surface.
These steps are crucial in ensuring a successful veneer reattachment project.
Cleaning the Surface
Preparing the substrate for bonding is akin to laying the foundation of a house; a clean and smooth surface is essential for achieving a strong and durable bond between the two materials.
When reattaching veneer to different surfaces, the first step in surface preparation is cleaning. Removing residue, such as dirt, grease, or old adhesive, is necessary to ensure that the new adhesive can bond effectively to the substrate.
Selecting the appropriate cleaning agent is crucial to avoid damaging the surface or leaving any residue that may interfere with the bonding process. Usually, a mild detergent solution or rubbing alcohol is enough to remove most contaminants from the surface. However, for stubborn residue, stronger solvents may be required, but caution should be exercised to avoid damaging the surface.
Once the surface is thoroughly cleaned, it can be sanded to create a rougher texture that allows the adhesive to penetrate better and form a stronger bond. Sanding the surface should be done carefully, using the appropriate grit sandpaper, and following the direction of the grain.
Sanding the Surface
Achieving a strong and durable bond between two materials requires a clean and smooth surface, which can be achieved by sanding the substrate carefully using the appropriate grit sandpaper to create a rougher texture that allows the adhesive to penetrate better and form a stronger bond.
The sandpaper grit used will depend on the type of surface being sanded, but generally, medium grit sandpaper is suitable for most surfaces.
When sanding, it is important to use consistent and even pressure to avoid creating uneven or rough spots on the surface.
The sanding technique should also follow the grain of the wood or surface being sanded to prevent damage or splintering.
Once the surface has been sanded, it is important to remove any dust or debris using a clean cloth or vacuum cleaner.
With a smooth and clean surface, the next step is to apply a primer to prepare the surface for the adhesive.
Applying a Primer
The application of a primer is a crucial step in the process of creating a strong and durable bond between the materials. By providing a base layer that enhances the adhesive’s ability to adhere to the surface. The benefits of priming include improved adhesion, increased durability, and better overall performance of the adhesive.
When applying the primer, it is essential to prepare the surface properly. Ensuring that it is clean and free of any debris. Tips for applying primer include using a brush or roller to apply a thin. Even layer, allowing it to dry completely before applying the adhesive, and ensuring that the primer is compatible with the adhesive being used.
By following these steps, the primer can create a strong foundation for the adhesive to bond to, resulting in a long-lasting and secure attachment between the veneer and the surface. Applying the adhesive is the next step in the process. By following proper procedures, a successful and reliable bond can be achieved.
Applying the Adhesive
Assembling the individual puzzle pieces using a precise and steady hand is crucial in successfully bonding the top layer of material back onto its base. When applying the adhesive, it is important to remember tips for precision and consistency in application.
To achieve the best possible result, make sure to apply the adhesive evenly and in a thin layer, using a brush or roller. Common mistakes to avoid when applying veneer adhesive include applying too much adhesive, which can cause the veneer to warp or bubble, and not allow the adhesive to dry completely before pressing the veneer onto the surface.
It is also important to ensure that the adhesive is suitable for the surface material. Using the wrong type of adhesive can lead to the veneer not bonding properly. Once the adhesive has been applied, the next step is to reattach the veneer using careful pressure and alignment techniques.
Reattaching the Veneer
When reattaching the veneer, it is important to properly align it with the surface it is attached to. This ensures a seamless and professional look.
Applying pressure is also necessary to firmly adhere the veneer to the surface. This helps to prevent any future lifting or peeling.
Aligning the Veneer
Proper alignment of the veneer is crucial for achieving a visually appealing and structurally sound final result. When reattaching veneer, it’s important to know how to align it to minimize the risk of damage properly.
One tip is to use a ruler or straight edge to ensure that the veneer is aligned straight. It’s important to make sure it lines up with adjacent pieces or the overall design of the piece. Additionally, it’s important to make sure that the veneer is aligned with the grain of the wood. Underneath, as this will help prevent warping or cracking over time.
By taking the time to properly align the veneer. You can ensure a successful reattachment with minimal damage and a beautiful, long-lasting final result.
Moving on to the next step, applying pressure to the veneer requires careful attention to the type of adhesive used and the amount of pressure applied.
Applying Pressure
Applying pressure to the veneer during the reattachment process is a critical step that requires careful consideration of the chosen adhesive and a gentle touch to avoid the risk of damaging the delicate surface.
It is crucial to allow enough time for the adhesive to dry and set properly, as rushing this step can result in a weak bond that may not hold up over time.
Using clamps is a popular method for applying pressure to the veneer, as they provide even and consistent pressure across the surface.
However, alternative methods such as weights or heavy objects can also be effective in applying pressure.
It is important to monitor the pressure being applied and make adjustments as needed to avoid causing any damage to the veneer.
Once the pressure has been applied, the next step is to move on to the finishing touches to complete the reattachment process seamlessly.
Finishing Touches
The final steps in the veneer repair process involve trimming the excess veneer, sanding the surface, and finishing it to match the surrounding area.
Trimming the excess veneer is crucial to ensure a seamless appearance and prevent any sharp edges.
Sanding the surface is necessary to even out the repaired area and prepare it for finishing.
The finishing process involves choosing the appropriate stain or paint to match the surrounding area and applying it evenly for a professional finish.
Trimming the Excess Veneer
Trimming excess veneer is a crucial step in the process of restoring damaged or worn-out furniture. The excess veneer can cause issues with the final finish of the furniture, and trimming it correctly can ensure a smooth and polished look.
There are various trimming techniques that can be used, including using a sharp utility knife or a veneer saw. It is important to avoid damaging the underlying surface or the remaining veneer while trimming. To ensure safety while trimming, protective gloves and eyewear should be worn, and the work area should be well-lit.
The tools needed for trimming excess veneer are easily available and include a utility knife. A veneer saw sandpaper and a sanding block. By using these tools and techniques, the excess veneer can be trimmed with ease. The final finish of the furniture can be improved.
The next step in the process is sanding and finishing the surface. Which will further enhance the appearance and durability of the furniture.
Sanding and Finishing the Surface
After trimming the excess veneer, the next step is to sand and finish the surface. Choosing the right sandpaper is crucial in ensuring that the surface is smooth and free from any imperfections. Coarse sandpaper is used to remove any rough spots or bumps on the surface. While finer sandpaper is used for a smoother finish.
Finishing techniques also play a significant role in ensuring that the veneer is securely attached to the surface. Some common techniques include staining, lacquering, and polishing. The chosen technique will depend on the type of veneer and the surface it is being attached to.
By sanding and finishing the surface properly. The veneer will not only be securely attached but will also look aesthetically pleasing.
Conclusion
In conclusion, reattaching veneer to different surfaces requires careful consideration of the type of adhesive to be used. Depending on the material of the surface and the type of veneer being used, different adhesives may be more suitable than others. It is important to understand the properties of different adhesives and their compatibility with the materials involved.
Once the appropriate adhesive has been selected, proper preparation of the surface and veneer is crucial for successful bonding. Applying the adhesive in a consistent and even manner. Allowing sufficient drying time are also an important step in the process. Finally, finishing touches such as sanding and staining can give the reattached veneer a seamless appearance.
As the saying goes, ‘a stitch in time saves nine. Taking the time to choose the right adhesive and carefully following the reattaching process can prevent future damage. Save time and money in the long run. By understanding the different types of adhesives available and their suitability for different surfaces. Veneers, one can achieve a successful, long-lasting repair.