Removing glued down flooring may seem like a daunting task, but with the right approach and tools, it becomes a conquerable challenge. As a seasoned professional in the flooring industry, I have encountered numerous scenarios where removing glued down flooring was a necessity. In this comprehensive guide, I will share my personal experiences, professional expertise, and insider tips to help you successfully remove glued down flooring like a pro.
I. Preparing for the Removal Process
A. Gathering the Necessary Tools and Materials
Before embarking on your flooring removal journey, ensure you have the following tools and materials ready:
- Floor scraper: A sturdy and sharp floor scraper is essential for effectively removing the flooring.
- Heat gun: Use a heat gun to soften stubborn adhesives, making them easier to remove.
- Adhesive remover: Choose a quality adhesive remover suitable for your flooring material.
- Protective gear: Wear gloves, safety goggles, and a respirator to safeguard yourself from dust and fumes.
- Plastic sheeting: Use plastic sheeting to protect adjacent surfaces and minimize the spread of debris.
B. Assessing the Flooring Type and Condition
Identifying the flooring material and evaluating its adhesive strength are crucial steps in planning your removal strategy. Take note of any potential hazards, such as asbestos or other harmful substances, and consider consulting professionals for testing if needed.
C. Clearing the Work Area
Create a clear and organized work area by removing furniture and fixtures. Protect adjacent surfaces and walls using plastic sheeting to prevent accidental damage during the removal process.
II. Removing Glued Down Flooring with Heat
A. Preparing the Heat Gun
Set the heat gun to the appropriate temperature and ensure proper ventilation in the work area. Safety should be your top priority throughout the process.
B. Softening the Adhesive
Apply heat to the glued-down flooring in a controlled manner, focusing on small sections at a time. Monitor the adhesive’s reaction to the heat and adjust the temperature as necessary.
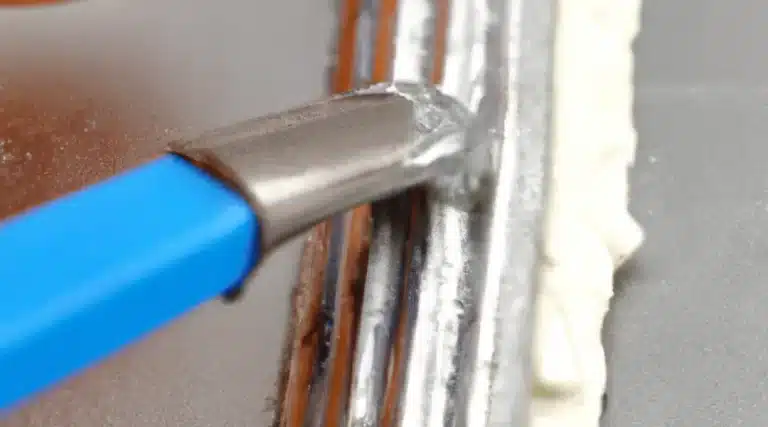
C. Scraping off the Flooring
Using a floor scraper or putty knife, gently scrape away the loosened flooring sections. Work methodically and be patient, as this step requires precision and perseverance.
D. Cleaning and Disposing of Debris
Collect the removed flooring sections and debris carefully, disposing of them properly according to local regulations. Maintaining a clean work area throughout the process ensures safety and efficiency.
III. Removing Glued Down Flooring with Adhesive Remover
A. Selecting the Right Adhesive Remover
Consider the flooring material and choose an adhesive remover specifically designed for that type of flooring. Read product labels and instructions thoroughly to ensure proper usage.
B. Applying the Adhesive Remover
Before applying the adhesive remover to the entire floor, test it in a small, inconspicuous area to check for any adverse reactions. Apply the remover evenly over the glued down flooring.
C. Allowing Sufficient Dwell Time
Give the adhesive remover sufficient time to penetrate and loosen the adhesive. Avoid premature removal attempts, as they may lead to incomplete removal or damage to the subfloor.
D. Scraping and Cleaning the Flooring
Using a floor scraper or putty knife, gently scrape away the adhesive residue. Clean the flooring surface thoroughly to ensure a smooth and adhesive-free result.
IV. Alternative Methods for Removing Glued Down Flooring
A. Freezing the Adhesive
Consider using dry ice or freeze spray to freeze the adhesive, making it brittle and easier to remove. Carefully scrape off the frozen adhesive using a floor scraper or putty knife.
B. Using Mechanical Methods
In cases where heat and adhesive removers are not effective, mechanical methods such as floor grinding or sanding can be viable options. Renting specialized removal equipment may be necessary for larger projects.
C. Seeking Professional Assistance
If you encounter challenges or lack the necessary expertise, don’t hesitate to seek professional assistance. Professionals have the experience and tools to tackle even the most stubborn glued down flooring removal tasks.
V. Safety Precautions and Tips
A. Protective Measures
Always prioritize your safety by wearing gloves, safety goggles, and a respirator to protect yourself from dust and fumes. Additionally, maintain proper ventilation in the work area.
B. Dealing with Hazardous Materials
If you suspect the presence of hazardous materials like asbestos, consult professionals for testing and handling procedures. Proper disposal of hazardous waste is critical for the safety of both humans and the environment.
C. Minimizing Damage to Subfloor
Work carefully and diligently during the removal process to minimize damage to the subfloor. Address any damages promptly and prepare the subfloor adequately for new flooring installation.
Conclusion
Mastering the art of removing glued down flooring is achievable with the right knowledge, tools, and mindset. By following the step-by-step guide outlined above, you can confidently take on this task and transform your space. Remember to prioritize safety, be patient, and seek professional assistance if needed. With dedication and perseverance, you’ll achieve remarkable results in no time.