Welcome to the ultimate guide on creating amazing slime recipe with glue, borax, and contact solution! Slime-making has taken the world by storm, captivating the hearts of both kids and adults. If you’re looking for a fun and engaging activity that unleashes your creativity and provides a sensory experience like no other, you’re in the right place!
Slime has become a sensation, offering a squishy, stretchy, and oh-so-satisfying playtime experience. Whether you’re a seasoned slime enthusiast or a beginner eager to dive into this fascinating world, this guide will equip you with the knowledge and techniques to craft incredible slime creations.
In this comprehensive guide, we’ll explore the key ingredients needed for slime-making recipe using glue, borax, and contact solution. We’ll delve into their roles and discover the magic they bring to the slime-making process. But safety always comes first, so we’ll also cover important precautions to ensure a worry-free slime adventure.
Understanding the Ingredients
Glue, borax, and contact solution are the holy trinity of slime-making. Glue provides the base for your slime, while borax or contact solution acts as the magical activator. Let’s delve into each ingredient to understand their roles in creating the perfect slime concoction.

Safety Precautions
1. Adult Supervision is a Must
Always have an adult present when making slime, especially if young children are involved. They can provide guidance, assist with measurements, and ensure that safety precautions are followed throughout the process.
2. Choose Non-toxic Glue
Opt for non-toxic glue options, such as school glue or craft glue. Read the labels carefully to ensure they are safe for use, particularly if children will be handling the slime.
3. Use Non-toxic Borax Alternatives
If you choose to use borax as an activator, ensure it is non-toxic and suitable for slime-making. Alternatively, explore borax-free recipes that utilize safe alternatives like contact solution or liquid starch.
4. Check for Allergies and Sensitivities
Before starting the slime-making process, be aware of any allergies or sensitivities among the participants. Avoid ingredients that may trigger allergic reactions and opt for hypoallergenic options whenever possible.
5. Keep Slime Away from the Mouth
Emphasize the importance of not eating or putting slime near the mouth. Although the ingredients used are generally non-toxic, ingestion can still lead to discomfort. Encourage safe and responsible play.
6. Avoid Contact with Eyes
Make sure to keep slime away from the eyes to prevent any irritation or discomfort. If accidental contact occurs, rinse the eyes with clean water and seek medical attention if needed.
7. Wash Hands Thoroughly
After playing with slime, everyone should wash their hands with soap and water to remove any residue. This simple practice promotes cleanliness and hygiene.
8. Store Slime Properly
When not in use, store slime in a sealed container to prevent it from drying out. This not only extends its lifespan but also keeps it away from pets or younger children who might mistake it for food.
By following these safety tips, you can ensure a worry-free slime-making experience, creating cherished memories while keeping everyone safe and sound. Let the slime-making fun begin!
Gathering Supplies
To ensure a successful slime-making experience, make sure you have all the necessary supplies at hand. Here’s a handy list of what you’ll need:
1. Quality Glue: A bottle of clear or white school glue serves as the base for your slime. It provides the stretchy and gooey texture that we all love.
2. Borax or Contact Solution: Choose your slime activator based on personal preference and availability. Both borax and contact solution work effectively in creating slime.
3. Optional Additions: Take your slime to the next level by adding some extra flair. Here are a few suggestions:
- Food Coloring: Make your slime vibrant and eye-catching by incorporating a few drops of food coloring. Mix and match colors for a truly personalized slime creation.
- Glitter: Add a touch of sparkle and magic to your slime by mixing in glitter. Choose from a wide variety of colors and sizes to suit your style.
- Small Beads: Enhance the texture of your slime by adding small beads. They can create a satisfying crunch and make your slime even more enjoyable to play with.
By having these supplies ready, you’ll be well-prepared to embark on your exciting slime adventure. Get creative and let your imagination run wild as you mix and mold your very own personalized slime masterpiece!
Step-by-Step Guide: Making Slime with Glue and Borax
Get ready to unleash your inner scientist! Follow these simple steps to create your own slime masterpiece:
1. Setting up your workspace
Prepare a clean and organized area where you can mix and play with your slime. Lay down some newspaper or a plastic tablecloth to keep things tidy.
2. Measuring and mixing glue and water
Pour a desired amount of glue into a bowl, adding water in equal proportion. Stir the mixture until it’s well combined. This is the base of your slime.
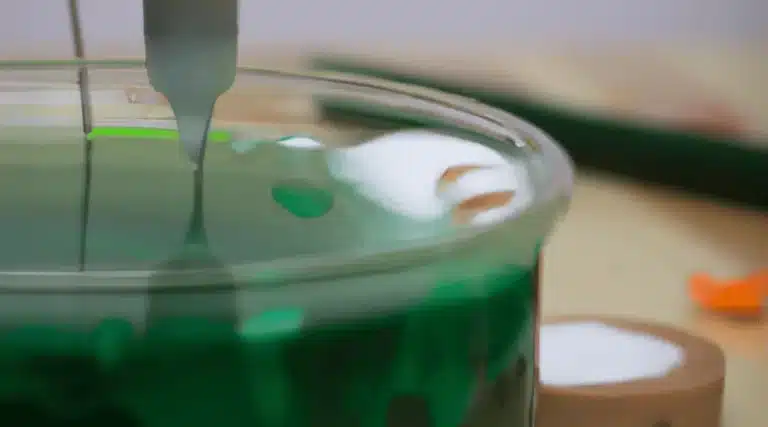
3. Preparing the borax solution
In a separate container, dissolve a teaspoon of borax in warm water. Stir until the borax is completely dissolved.
4. Combining the glue and borax solution
Slowly pour the borax solution into the glue mixture while stirring continuously. Keep mixing until the slime starts to form.
5. Kneading and troubleshooting the slime texture
Take the slime out of the bowl and knead it with your hands. If it’s too sticky, add a small amount of borax solution or contact solution. If it’s too stiff, add a bit of water. Find that perfect consistency that you love!
6. Storing and preserving the slime
After you’re done playing, store your slime in an airtight container to keep it fresh and ready for the next adventure.
Alternative Method: Making Slime Recipes with Contact Solution
Don’t have borax on hand or prefer a borax-free recipe? No worries! You can make slime using contact solution as an alternative activator. Here’s how:
1. Gathering the ingredients
Grab your glue of choice, a bowl, and a bottle of contact solution. Simple, right?
2. Mixing the glue and contact solution
Squeeze the desired amount of glue into the bowl. Add a few drops of contact solution and stir until the slime starts to come together.
3. Kneading and perfecting the slime
Take the slime out of the bowl and knead it with your hands. Adjust the texture by adding more contact solution or glue, as needed. Get ready to enjoy your homemade slime creation!
Exploring Variations and Customizations
Now that you’ve mastered the basics, it’s time to level up your slime game! Let your creativity shine by exploring these amazing variations:
1. Adding color to your slime
Inject some vibrant hues into your slime by using food coloring or liquid watercolors. Go for a monochromatic look or mix different colors to create a mesmerizing rainbow effect.
2. Experimenting with different types of glues
Step out of your comfort zone and try various types of glue, such as glitter glue, metallic glue, or even glow-in-the-dark glue. Each glue type will bring its own unique charm to your slime.
3. Incorporating glitter, beads, or other embellishments
Take your slime to the next level by adding some bling! Sprinkle in glitter, mix in colorful beads, or experiment with other tiny embellishments. Let your imagination run wild!
4. Making scented slime with essential oils
Engage your sense of smell by adding a few drops of your favorite essential oils. Whether it’s the sweet aroma of lavender or the refreshing scent of citrus, scented slime adds an extra layer of sensory delight.
Troubleshooting Common Issues
Sometimes, slime doesn’t behave as we expect. Here are some common issues and their simple solutions:
1. Sticky slime: Causes and solutions
If your slime feels too sticky, add a small amount of borax solution or contact solution. Knead it thoroughly until the stickiness disappears.
2. Over-activated slime: How to fix it
If your slime is too stiff and breaks easily, try adding a few drops of water or a small amount of glue. Knead it well until you achieve the desired stretchiness.
3. Adjusting slime consistency: Too runny or too stiff
For runny slime, add a small amount of borax solution or contact solution. If your slime is too stiff, add a few drops of water or a bit more glue. Keep tweaking until it’s just right!
Slime Storage and Maintenance
You’ve put your heart and soul into creating that perfect slime. Now, let’s ensure it stays fresh and ready for playtime:
1. Proper storage containers and techniques
Store your slime in airtight containers, such as ziplock bags or reusable plastic containers. This will prevent it from drying out and keep it soft and stretchy.
2. Preventing slime from drying out
If you notice your slime starting to dry out, add a small amount of water or contact solution. Knead it well to revive its elasticity and bring it back to life.
3. Reviving dried-out slime
Don’t fret if your slime has dried out completely. Add a few drops of water or contact solution, then knead it vigorously. With a little love and care, your slime will bounce back!
Clean-Up Tips and Precautions
Slime-making is all about fun, but let’s not forget about the mess. Here are some tips to keep things tidy:
1. Removing slime from various surfaces
To remove slime from surfaces like tables or clothing, gently scrape off any excess with a spoon or dull knife. Then, use warm soapy water to wash away the residue.
2. Cleaning slime off hands and clothing
If you find slime stuck to your hands or clothing, simply wash them with warm water and soap. Slime should easily come off without leaving any stains.
3. Tips for minimizing mess during slime-making
Place a plastic tablecloth or newspaper on your workspace to catch any spills or drips. This way, you can focus on having a blast without worrying about the aftermath!
Slime Play and Sensory Benefits
Slime isn’t just about fun and games—it also offers a range of sensory benefits that both children and adults can enjoy:
1. Exploring the sensory experience of playing with slime
Dive into a world of texture and touch as you squish, stretch, and shape the slime. The ooey-gooey sensation provides a satisfying tactile experience for your fingers.
2. Calming and stress-relieving properties of slime
Feeling stressed or anxious? Slime can be a fantastic stress buster. The rhythmic kneading and sensory engagement can help relax your mind and provide a sense of calm.
3. Creative uses of slime for sensory play and education
Slime is a versatile sensory tool that can be used for various educational and therapeutic purposes. It can enhance fine motor skills, promote creativity, and even be used in science experiments. The possibilities are endless!
Slime Safety for Young Children
While slime is generally safe and fun, it’s essential to ensure its suitability for young children:
1. Guidelines for slime play with toddlers and preschoolers
Supervision is key when young children play with slime. Ensure they don’t put it in their mouths and monitor their interaction to prevent any accidents.
2. Supervision and age-appropriate slime recipes
Choose slime recipes that are safe for young children, considering their age and developmental stage. Keep in mind that younger children may require more guidance and assistance.
3. Avoiding ingestion or contact with eyes
Emphasize the importance of not eating or rubbing slime near the eyes. Encourage safe and responsible play to ensure everyone has a delightful slime experience.
Conclusion
In conclusion, creating slime recipe with glue, borax, and contact solution is an easy and enjoyable activity that opens up a world of sensory delight and endless possibilities. With just a few simple ingredients and the right guidance, you can craft your very own gooey masterpiece. Whether you choose to stick with the classic recipe or explore alternative methods using contact solution, the process remains fun and rewarding. So gather your supplies, unleash your creativity, and dive into the magical realm of slime-making. Get ready to experience the joy and satisfaction that comes with stretching, squishing, and playing with your homemade slime. Let the mesmerizing textures and vibrant colors spark your imagination and bring endless hours of entertainment. Start your slime adventure today and delight in the captivating world of easy slime recipe with glue, borax, and contact solution.